Wednesday, 30 March 2016

Final Campaign

Final teaser poster:

Final main campaign poster:

Final DVD cover:

Thursday, 17 March 2016

Report

For my coursework I decided to do print which included creating a DVD cover, a main campaign poster and a teaser poster under the genre horror. I conducted primary and secondary research to see what people wanted to see in a horror film. I analysed popular horror posters, such as ‘The Conjuring’, ‘Insidious’ and ‘The Last Exorcism’, to give me ideas of the codes and conventions of horror sub-genres. I analysed many posters and took the layout, typography, tag line, colours, design and images used on board to help me get a better understanding of a high quality campaign. Through primary and secondary researched I found out all I needed to know to make a frightening horror poster for both males and females in their teenage years. I researched into the fears of teenagers and the way psychological horror films trick the mind into being scared. From the book ‘Horror films’[1] it said that ‘Psychological: Perhaps one of the most terrifying of monsters, the psychotic killer is based entirely in the real world’. From this I found that the exploitation of a true story creates the most discomfort. I then researched into the background of Longleat which I could base my narrative upon. I conducted a focus group aged 16 to 17 and I used two boys and two girls to make sure I received equal feedback. I referred back to them throughout the whole of my project.

When researching ‘The Last Exorcism’ I discovered that the distributers campaigned on 'Chat roulette’, which isn't something I could use so I looked at the conventions on the poster instead. I found that the typography was the main focus and stood out massively. An insight into the religious aspect of the film was seen through the enigma codes of the images used. I also found that the same colours were used on each campaign so they all linked together. Similarly the Insidious poster has a bold typography and used a child as their main focus. The boy on the poster is in fact the main character and with reference to Prop's Narrative Theory the iconography of the poster let the audience see's he is the villain. The primary colours are mainly dark, as this is a convention of a horror film, but the bright red in his shirt matches the red in the typography that makes the poster stand out and creates a sense of equilibrium. This red also signifies danger to back up the point that the boy is evil. From this I decided my poster would have a little boy as the main focus and a dark colour scheme with my typography standing out.

My favourite piece of research was the questionnaire. I gave out 50 questionnaires to my target audience of 15 to 22 year olds to help me to get a better understanding of what teenagers are looking for. I decided on this target audience as I am 17 myself and can predict what teenagers are looking for in a horror film. My questions ensured that I would have a rough idea of what I should put on my main campaign poster and DVD cover to get the attention from my target audience. I used my findings to create my image. I found that the majority preferred the DVD cover 'Shutter' as it was darker and therefore looked scarier. The sub genre psychological was in the top three favourites that helped me to make a final decision on the sub genre I would use. The majority who answered the questions were males aged 16 to 18 who were in current college education. The demographic category helped me to narrow down my target audience to the C2, D and E category. It is more likely for a young and more unskilled male to watch a horror film than someone who is in the A, B and C1 category. They will appreciate the narrative of my script and the mise-en-scene of my campaign more. 

In order to write a script in the correct way I had to do my research. I researched the codes and conventions of a general script to give me an idea of the layout. I analysed the screenplay 'The Grudge' by looking at the characters, the location and the mise-en-scene to do a script breakdown. I used the layout as a guide to follow. When writing my script I had to make sure it was appropriate for my target audience. I researched the appropriate language of a generic horror film with the age rating of 15. I found that strong language and sexual references were a common convention. To make my characters relatable to a teenager based audience I looked into the characters in the film ‘The Cabin in the Woods’. There are five main characters who are labeled as the ‘athlete’, ‘whore’, ‘scholar’, ‘virgin’ and ‘fool’.  These are American stereotypes that an audience picks up on in any type of film. These conventions of these characters helped me to define the mannerisms of my own characters.

My first task in the making of my campaign was my typography. I looked online to see what was a popular style of psychological horror and came across the film poster for 'The Ring'. It inspired me as the font looks like it is written by a child, that then creates an enigma code for the audience. As my film is based on a supernatural child I wanted a similar style font. At first I used PowerPoint to type my typography but that didn't give me the best result so I decided to go straight onto Pixlr.com. I used the brush tool to experiment with creating my own typography so it would stand out more. Eventually I got it just right as Pixlr.com turned out to be the better software. My typography changed drastically multiple times but even my focus group agreed that the end result was the best result and using white made it effectively stand out.

From my research into the semic codes of psychological horror films I found that the main colours were blues, greens and greys. Although the colour red is a typical semic code of a horror poster I discovered that it is mainly used in the sub-genre slasher, action, body and zombie. I knew I had to incorporate the colour somehow as it goes really well on black which I knew would be my background as it is an instant denotation of the horror genre. My first mock up poster resulted in being too dark and didn't stand out. The images I used looked like photographs which isn't a convention of a poster. I took the feedback, which my focus group gave to me, on board. During the making of all of my mock-ups I used Pixlr.com which is a great manipulation software. I used the filters and adjustments well in order to completely transform an image in ways I never though I could. At the start of the project the software was sometimes confusing, however I quickly picked up how to work it and it suddenly became easy. 

I kept to a time plan to ensure that my campaign would be completed in an achievable time period. My pre-production work was planned early on with a time plan and was easily achieved. For my production I made sure I had my images early on in my project and made sure they were ready for lessons. I also devoted time at home to edit and complete areas of my work and had them available at both home and college. When comparing my work to a professional campaign such as ‘Insidious’ the finish could be better. The images I used were edited to the point where they began to pixelate. A downfall of all three pieces of my coursework is the pixilation. Pixlr.com was an easy photo manipulation software to understand and gave me multiple tools to work with such as the lasso tool and colour adjustments. Using the colour tool I could have a consistent colour scheme throughout all three pieces. I also used the same typography on each campaign which shows the sub-genre well. I think my typography is a strength as it stands out and gives the ghostly effect I am after. My teaser poster is minimalistic and can be compared to the ‘Insidious 2’ teaser poster.  At the bottom of the poster I used a hash tag which is well known on twitter and my target audience can use that to find more information on the film. My teaser poster is simple and effective and stands out with black, white and a cold green being the main colours. If it was to be out on a billboard I think it would be most effective.

My main poster could be improved as the eyes don’t look very realistic. By drawing around them in white paint it makes the whole poster stand out more, however they don’t look very professionally done up close. I think my tagline is very effective and creates an enigma. Similarly on my DVD cover it is slightly pixelated. Although I saved my images as a PNG from the amount of editing they pixelated. If I had a chance to do it again I would be more careful with my images. For my overall finished product I feel I achieved what I was hoping for. From my first mock up to my final posters I progressed massively and I feel my sub-genre comes through in the typography and colour scheme and my tagline encourages the audience to watch the film.


Word Count - 1615


[1] Horror Films published by Odell, Collin, Le blanc and Michelle in March 2001

Wednesday, 16 March 2016

Bibliography

Books:

Odell, Collin, Le Blanc, Michelle 'Horror Films' March 2001


Websites:

http://www.moviefone.com/2015/07/07/best-teen-horror-movies-ranked/

http://www.bbfc.co.uk/what-classification/15

http://thecabininthewoods.wikia.com/wiki/Characters

http://www.forbes.com/sites/markhughes/2015/10/29/the-best-horror-films-of-the-last-5-years/#56dc74cc2c9a

Friday, 5 February 2016

Mock Up Images for DVD Cover


Here I have cropped the image and pulled the contrast up and the darkness down. I use this image on the back of my DVD cover.


To make the image more sinister I added the image of the litter boy in the background. I darkened him out to give the effect that he is lurking in the shadows.


Here I used the image I previously edited as the background and used the boy but enlarged him. I took a chunk from the sky and duplicated it to use at the top of the spine of my DVD cover. I duplicated the image of the boy as well and made it smaller to put onto the spine.

This image here can be seen on the left hand side of my DVD cover below. I cropped it so it was a vertical image and the played around with the brightness, contrast and curves. I changed the hue and color so it looks turquoise to match the sky in the other image.


I used this image on my DVD back cover and brought the brightness down and the contrast up to get a nice effect.


To get this image I used the edited images and merged the together. I used the background image and make it big enough and then blacked out the background so it merges together. I inserted the images and made them small enough and then used the brush tool to go around them so they blend in, I inserted the table I made and all of the appropriate information such as the DVD sign and the age restrictions. To complete the back cover I need to add the blurb and credits.

I scratched the eyes out in white using the pencil tool on 'sticky' which I think looks more effective.


Thursday, 4 February 2016

Mock Up Images for Poster


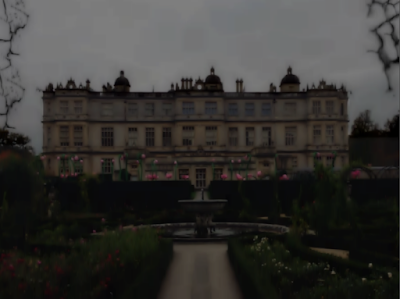
Here I darkened the image with the brightness and contrast tools. I then made the image appear more blue than green using the colour balance tool. I selected the sky using the lasso tool and make the sky dark on its own. I used the brush tool to create the crack effect in the corners. Finally, to created the blur look I used the gaussian blur filter. To make this image scarier I will remove the pink and make the house look older.
Firstly I edited this image by using the wand and lasso tool to cut around him. I then brought the brightness and contrast down. I also used the curve tool to make the image darker.


I put my typography and tagline onto my poster by using the wand tool and deleting the background. I darkened the whole image slightly as a whole and this is the result. I also edited the eyes of the boy by darkening them with the brush tool.


Here I blacked out the pink flowers usuing the brush tool. I the lightened the background image of the house so the poster will stand out more. I experimented with the curve tool to make the image of the book look darker in areas. I also experimented with the brush tool and added splatters and cracks to make the poster stand out from afar.

This is the image with the new typography.


 Using the free distort tool I pulled my image up to make it appear bigger. I black out to background using the fill and brush tool but keep some to and colored it red to add cracks. I blended them in to give the effect that they are creeping up on the house. I used the curve tool to find a good balance of light. I played around with the color balance, hue and saturation and contrast until I found the right level. I made the image bigger and distorted it again until it looked dominating. I think this is effective as it looks more like a poster.
I distorted the image a lot more and used the color tool to create the blue / green effect in the sky. I also added cracks to give the effect of a storm. I darkened the image and I think it looks very effective.


I think the sky looks very effective here.


 I distorted the image and pulled the contrast right up and the brightness down to get this look.
 I played around with the lighting and saturation until I got a dark image. I distorted the image up a lot so it had a daunting feel to it. I used the filter glamour glow to make it slightly blurry.


This image looks more sinister as he is smiling.


To get this image I used the curve tools and contrast to create a bright but sinister look. I maintained the viability of his facial features apart from the eyes which I blackened out.
Here I turned the contrast up and used the curve tool to make the clouds more visible. I distorted the image to make it more imposing using the free distort tool.


Here I used three images i previously edited and brought the brightness down on all of them. I put my tagline, title and credits on the poster and used the brush tool with low opacity to get the dark effect around the sides.


Poster tweaked.


Possible idea for teaser poster or main campaign.


Tuesday, 2 February 2016

Mock Up Images for Teaser Poster


For this image I used the lasso tool to crop out the body and face and used them as a seperate layer in order to make her face look brighter. I used the curve tool to make the face look really bright. I widened her mouth to make it look like she is really screaming by using the buldge tool. On the other layer I played with the brightness to make the background look darker. I then used the brush tool to create the white dirt effect around the sides.
For this image I used the free distort filter to create the illution that she is being seen through the eye of someone else. This is effective to the audience because it looks like she is afraid of them, or something behind them. I brightened her face and bulged her mouth slightly too.


To make this image look dark I exaaggerated the curve tool until the background was black. I then adjusted the brightness to make the image look mysterious.


I edited this image by making it very bright. I used the glamour glow filter to make him appear as a ghost.


I used the image of the boys face and pulled the brightness down to make him look sinister. I removed his freckles with the blemish tool as they made him appear cute and innocent.
I added the typography, date and credits to this image and made the face smaller. I also used the curves and color tool to get better lighting.
Teaser mock up tweaked.


To get this image I played around with the contrast and brightness. I made the image look greener using the curve tool. I whitened his eyes by using the brush tool at a very small size to create a creepy look.


Here I used the glamour glow filter on the face of the boy so it looks less like a photo.